How to Draw A Worm. When one thinks of animals, the large and imposing animals are often mentioned first. While they draw most of the attention, there are also tons of amazing little creatures to spot as you get closer to the ground.
Also, check our simple sunflower coloring pages.
Worms will be an example of this because while they may not be imposing in scale, they are pretty interesting if you look closely. Drawing a worm can also be a surprisingly complicated task!
Luckily, this tutorial makes it easier than expected. Get ready to learn how to draw one of these curvy little boys in this step-by-step tutorial on how to draw a worm in just 6 easy steps!
How to Draw A Worm
Step 1
You might think that learning to draw a worm is easy since there are no distinctive limbs or features to draw, but that’s not necessarily the case.
The type of worm that we will draw is made up of many small sections that allow it to crawl and squirm, and we will draw all of these small sections.
For this first step, we’ll start with the worm’s tail. The tip of the tail is the thinnest part of the worm, and you can draw it as a small rounded shape.
Then we can add more sections to the body. Each section will be drawn with a similar rounded line, but there will be a small gap in the middle where each shape ends.
Step 2
Now that you’ve drawn the tail of the worm design, we can start drawing the next section. To draw this central section of the worm, let’s continue what you started in the previous step of the guide.
This means drawing more rounded lines to create the worm’s body sections. Also, like the previous step, each section will grow more significantly over time. That’s all there is to this step. So if you’re ready, we can move on to step 3.
Step 3
You’re doing a great job with this tutorial on how to draw a worm so far! We will again draw another section in this third phase, which will be slightly different.
Worms often move as they move; we’ll represent this by drawing a curve in the body. The reference image shows that this next section will curve slightly on the side.
The main difference for this section is that the sections are slightly closer together as the worm bends. This shows that the body is bending and shrinking in this area.
Step 4
We are nearing the end of this worm drawing! Now let’s add the penultimate section of the worm.
This body part will curl up almost like it’s starting to form an S-shape.
Again, there will be a slight difference as the body gets smaller and thinner in the first turn and then gets a bit fatter as it curls back up.
In this step, we will also start drawing part of the background, and you can do this by drawing some rounded lines with sharp points at the top.
These act as a few blades of grass for the worm to crawl around. Then the next step is about the final details!
Step 5
In this step of our tutorial on how to draw a worm, we will not only finish the body of the worm, but we will also add the rest of the details to the background.
Draw more of these rounded sections to add the final twist section of the body. Make sure the tip of the worm is small and pointy enough!
Once the worm is complete, let’s add the rest of the background details. You can add more of these blades of grass along with some line detail on the ground around the worm.
Step 6
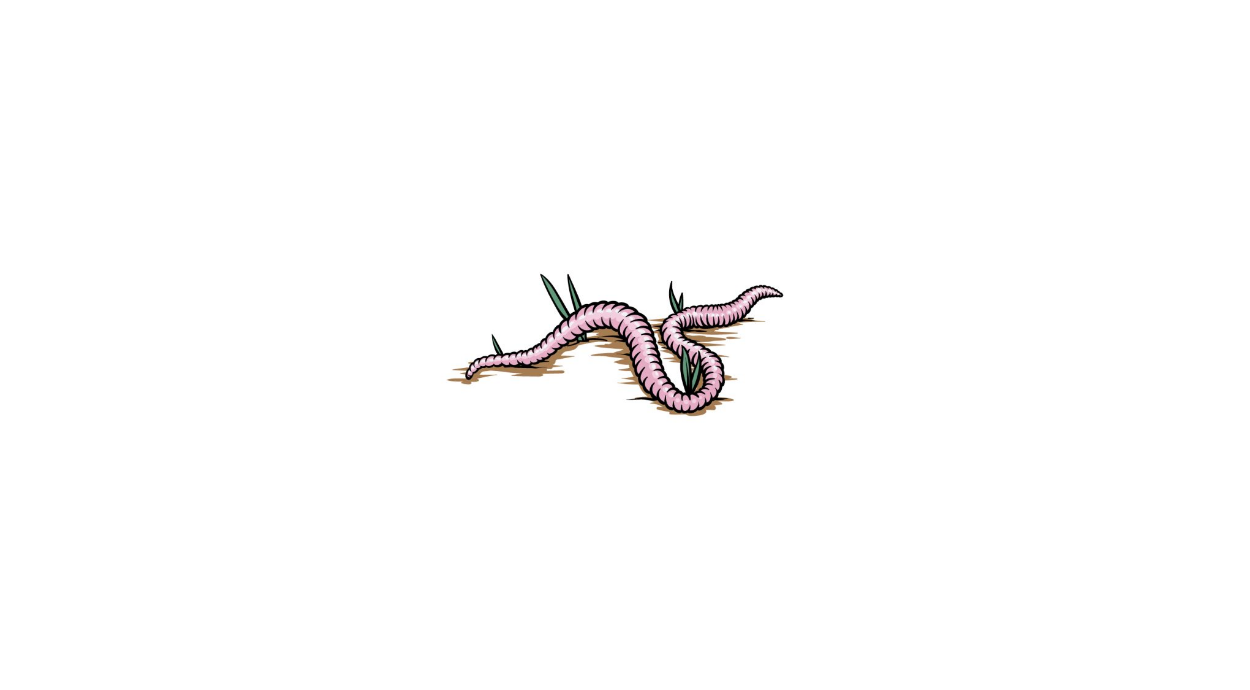
Now you can complete this worm drawing with fantastic colors! Our reference image used different shades of pink for the worm’s body.
We can create some texture detail for the worm using dark and light pink tones.
We also used some brown for the dirt and then finished with some green for the grass. There are some great additions you could make too!
An example would be spreading a thin layer of glue around the worm and then sprinkling some soil from your garden over it.
Your Worm Drawing is Finished!