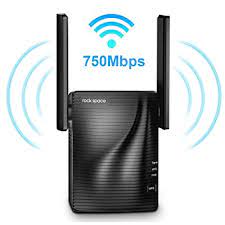
The “Rockspace” brand, among other things, sells Wi-Fi extenders. A Wi-Fi extender is a device that is used to improve the wireless signal of an existing Wi-Fi network in places where the signal is weak or non-existent. The Rockspace Wi-Fi extender is intended to improve Wi-Fi coverage and signal strength in a specific region of your house or workplace by receiving the signal from your router and rebroadcasting it at a higher strength. This is especially useful if you have dead areas in your home or wish to extend the range of your Wi-Fi network. The Rockspace Wi-Fi extender is normally plugged into an electrical socket and can be set using a mobile app or online interface.Re.Rockspace Extender Setup is a device for your office or home and goodbye to the poor connectivity.
You can set up your extender for your office or home and say goodbye to the poor connectivity.
You can configure your extender in two ways:
Re.Rockspace Extender Setup with using Manual method
Re.Rockspace Extender Setup via WPS Process
How to setup Re.Rockspace Extender with using the WPS button?
The term “WPS” refers for Wi-Fi Protected Setup, a standard that makes it possible to set up a wireless network quickly and securely. A user commonly uses the WPS method to create a secure wireless connection between their wireless device and router by pressing a physical or virtual button on their router and then entering a PIN or hitting a button on their wireless device.
Follow the given steps for Re.Rockspace Extender Setup Using WPS Button.
- Place your Re.rockspace extender in the same room as your wireless router and ensure that it is receiving power.
- Press and hold the WPS button on the Re.rockspace extender for 2-3 seconds until the WPS LED light starts blinking.
- Within 2 minutes, press the WPS button on your wireless router. The WPS LED light on your Re.rockspace extender will stop blinking and become solid when the connection is established.
- Wait for about 2 minutes for the extender to connect to your wireless network.
- Once connected, move your Re.rockspace extender to the desired location where you want to extend the network coverage.
- Check the signal strength of your wireless network on your device and make sure it has improved.
That’s it! Your Re.rockspace extender is now set up and ready to use.
If you are Facing any kind of issue during Re.Rockspace Extender Setup Don’t forget to connect us on our Toll-free number or via live chat we are here for your guidance
How to setup Re.rockspace Extender Via Manual Process?
A manual process for setting up a Rockspace Wifi Extender means that you will set up the extender by following a series of step-by-step instructions manually. This typically involves connecting your computer or mobile device to the extender’s default network, accessing the extender’s web-based setup page using a web browser, and configuring the extender’s settings to connect it to your existing wifi network.
Follow the given steps for Re.Rockspace Extender setup via manual process.
- Firstly, plug the extender into a power outlet for Re.Rockspace Extender Setup and turn it on.
- Connect your computer or mobile device to the extender’s wireless network. The network name (SSID) should be “Rockspace_EXT.”
- Open a web browser and type in re.rockspace.local or 192.168.10.1 in the address bar. Press Enter.
- The input of a username and password will be required. Both fields’ default values for username and password are “admin”.
- You will be taken to the Quick Setup page after logging in. Select the language of your choice, then click “Next.”
- On the next page, you will be prompted to select your wireless network.To extend a network, select it and then select “Next.”
- The password for the wireless network will then need to be entered. After entering the password, select “Next.”
- The extender will then verify the settings and establish a connection to your wireless network. This may take a few minutes.
- Once the connection is established, you will be asked to set up a new SSID and password for the extended network. Enter the details and click “Next.”
- Finally, you will see a summary of the settings you have configured. Review the information and click “Finish” to complete the setup.
Firmware Update
An upgrade to the software that runs on a rockspace extender is referred to as firmware. Typically, this update enhances functionality, corrects issues, and gives the extension new features.
To update the firmware on your rockspace extender, you will need to follow these steps:
- Connect your computer to the rockspace extender via Ethernet cable or Wi-Fi.
- Re.rockspace.local must be inserted into the address bar of your web browser.
- Log in to the rockspace extender using your login credentials.
- Click to the “Settings” menu and select “Firmware Upgrade.”
- Click on the “Check” button to see if there is a new firmware update available for your rockspace extender.
- If a new firmware update is available, click on the “Upgrade” button to start the upgrade process.
- Wait for the firmware update process to complete. Do not unplug or turn off the rockspace extender during the upgrade process.
- Once the firmware update is complete, the rockspace extender will automatically restart.
If you are Facing any kind of issue during Re.Rockspace Extender Setup Don’t forget to connect us on our Toll-free number or via live chat we are here for your guidance